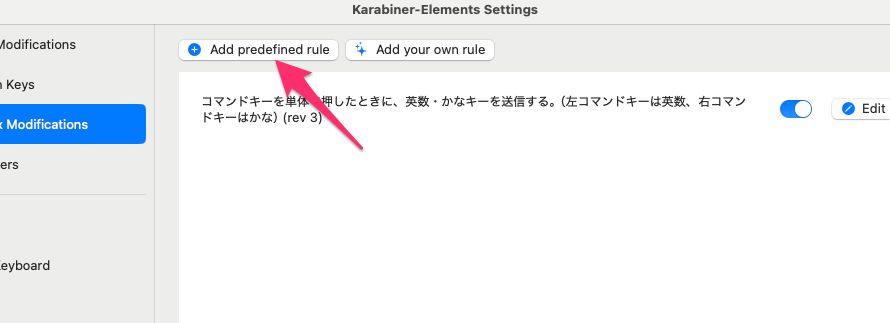
ここ最近、Google日本語入力の変換がどうにもならないくらいの誤変換っぷりでストレスがすごい。 新しいマシンを設定する時にことえり(Apple純正のIME)をちょっと使ったら結構良くなっていて、こっちに切り替えるか!と思ったものの一点だけ譲れない点が動作しない。 それは、テンキー入力した数字が確定されてしまう事。 Goole日本語入力の場合、かなモードでテンキーから数字を入力した時には通常の数字キーと同様の動作となり、変換待ちで入力できる。 これは、金額の桁わけ(3桁ごとにカンマ)をする時に便利かつミス防止ができて重宝している機能で使えないと不便。 kanabiner-Elementsで出来 […]
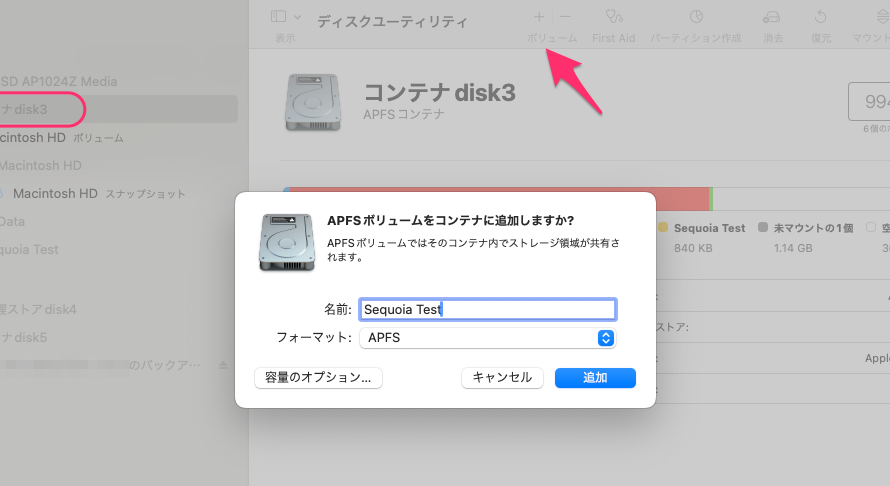
macOSがAPFSを採用してからしばらく経つが、OSのインストール手順も従来の方法とは変わっているっぽい。 以前はパーティションを分割してインストールするのが一般的だったけど、APFSでは「ボリュームを追加」してインストールするのが主流になっているらしい。 旧来の方法(HFS+時代) ディスクユーティリティでパーティションを分割 新しいパーティションを作成し、そこにOSをインストール 容量が固定され、後から増減が難しい 現在の方法(APFS環境) 「コンテナ」にボリュームを追加する(APFSの仕組み) ボリューム間でストレージを共有できるため、柔軟な容量管理が可能 macOSを別ボリュームに […]
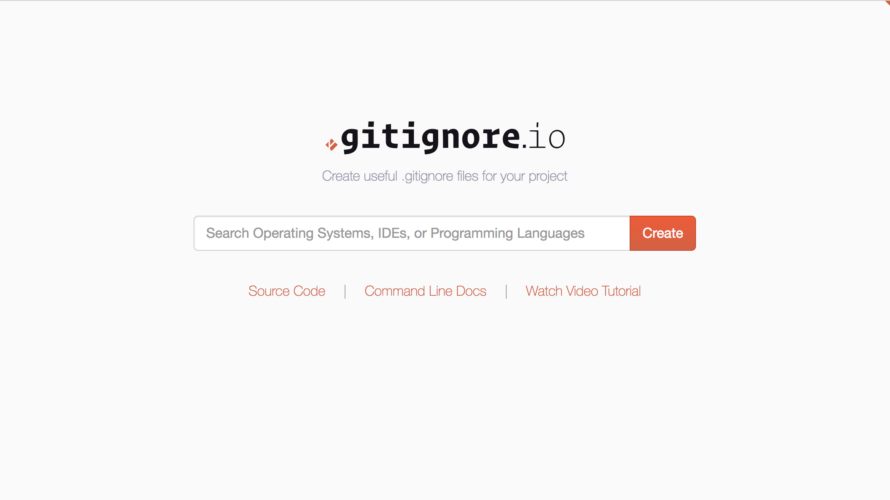
github/gitignore github/gitignore githubが管理しているgitignoreのテンプレート。 あまり知らない言語だとgitignoreに何書くか?となるので、ありがたい。 何かの記事で見かけたのだけど、探すのに手こずったのでメモしとく。 元記事は下記。 Pythonにおける.gitignoreに追加するべきファイル - Qiita https://qiita.com/youichi_io/items/8b976119b1c1fa4b3b78 gitignore.io gitignore.io 前に見かけた記事はこっちのサービスを使っていたかも。使っている言語 […]
10/11 追記 Amazonから特に連絡は無いけど、久しぶりに試してみたらフォームが表示された。とりあえず解決。 Amazonプライム会員は年間払いで入っていたのだけど、カードの有効期限切れでいつの間にか解約になっていた。 家族会員の紐づけも解除されてしまったので再度プライム会員登録して、 家族を共有に招待しようとしたら出来ないのでメモっておく。 Amazonプライムを家族共有する Amazonプライム会員情報メニューの最下段 https://www.amazon.co.jp/gp/primecentral?ref_=nav_AccountFlyout_prime の「プライム特典を共有する […]
Mac版 DraftSight 2023にアップデートしたら再アクティベート出来ない問題を解決 新しいバージョンが出ていたのでアップデートしたらアクティベーションの「インターネットで自動的に」のところでエラーとなってアクティブ化出来ない問題に遭遇。 解決策 最近のmacだとよくあるセキュリティ設定の影響っぽい。 設定からセキュリティとプライバシーからフルディスクアクセス > DraftSightのところのチェックマークを付ける。 アクティベートする フルディスアクセスの権限を与えた後にアクティベーションを行う。 OK!
ラベルシールを印刷するとズレる問題 環境:macOS 12.6 Monterey プレビューでPDFの印刷時、FBAのラベルを印刷することがよくあるのだけど、なんかズレるんだよな、と気になっていた。 たまたま他のラベルを作る機会があって、A-oneのラベル屋さん(webアプリ)で作成した時に、印刷する時は100%に設定して印刷しろと指示があった。 そうなの?知らんかった。試してみると、確かにズレない。じゃあ、それをプリセットに保存しておけばおkなのか。 印刷プリセットでサイズ調整100%が保存できない問題 プリセットに保存しておけばおkのはずだけど...出来ない。何度やっても戻ってしまう。 毎 […]
この記事の内容 Googleグループをメーリングリストのように使う時に このグループから退会し、グループからのメールの配信を停止するには groupmail+unsubscribe@example.com にメールを送信してください のようにフッターがついてしまう問題の解決法。 そもそも「標準のグループ フッターを含める」設定のチェックを外す事ができない場合 このとおり、「デフォルトのグループフッターを含める。」という項目がグレーアウトしていて、変更できないです。つまり、このフッターは強制ということになります。 Google Groupのメールフッターが強制になってしまった件(ただしG Sui […]
久しぶりにWordPressをインストールしてみる。 php8.1-fpmで試したけどプラグインやテンプレートによって対応状況がまちまちっぽい。 実際テンプレートによっては動かなかったので、今の所はphp7.4で動かしておいて時期を見て考える。 構成 OS: ubuntu Webサーバ: Nginx DBサーバ: MariaDB PHP: php7.4-fpm php7.4-fpmインストール sudo apt install php7.4-fpm 必須&推奨PHPモジュールインストール sudo apt install php7.4-mysql php7.4-curl php7.4- […]
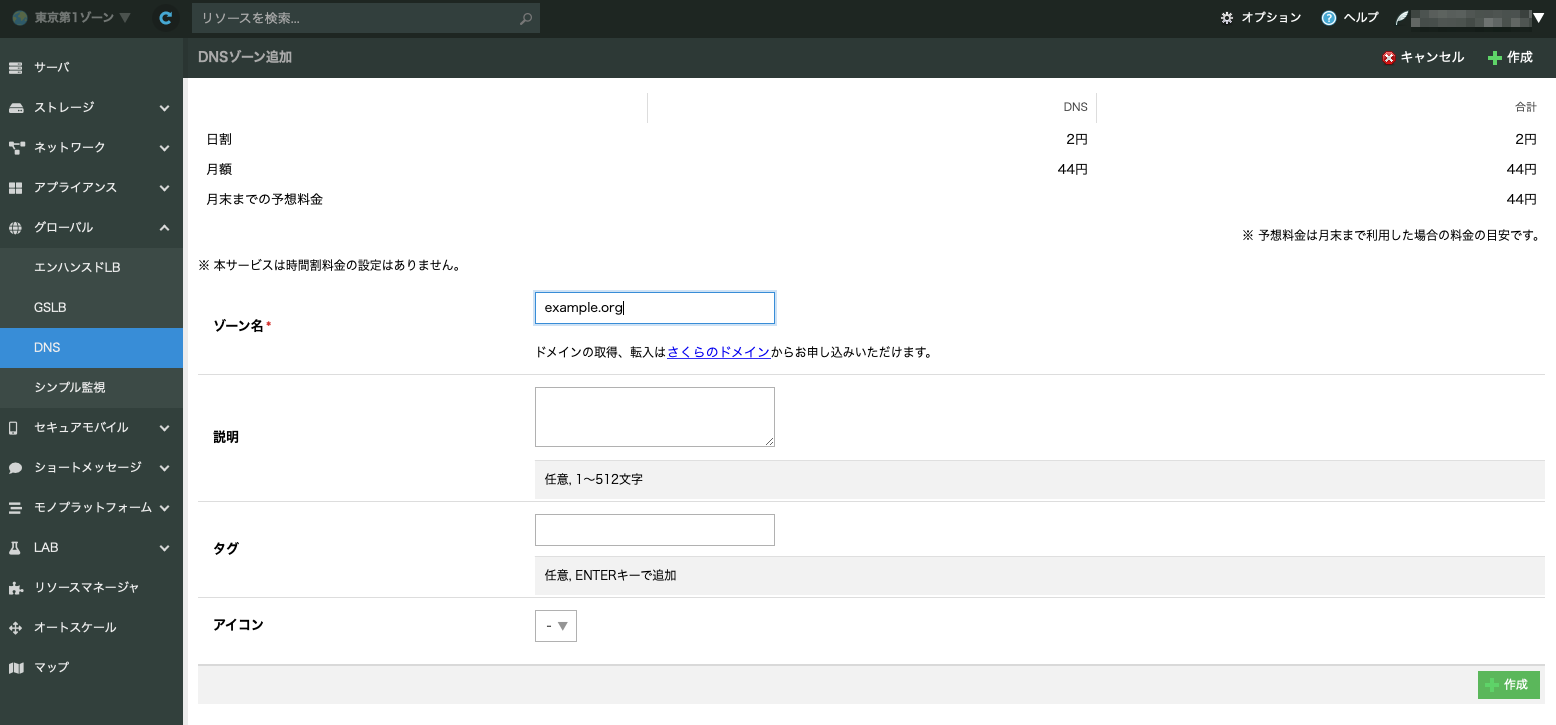
主にDigitalOceanのエントリの内容にワイルドカード証明書を作るための作業を付加したもの。参考エントリをかいつまんでまとめた作業。 環境 Ubuntu 20.04 Nginx 1.18.0 下準備 さくらのクラウドでDNSゾーンの作成 バリュードメインにDNSレコード追加 さくらのクラウドでAPIキー作成 さくらのクラウドでDNSゾーンの作成 1DNSゾーン 44円/月のコストパフォーマンス 他のレコードもそのうち引越す DNSはバリュードメインで管理していたけど、この価格なら全て引っ越してもよいかも。とりあえずはacmeチャレンジのみ行う。 バリュードメインにDNSレコード追加 _a […]
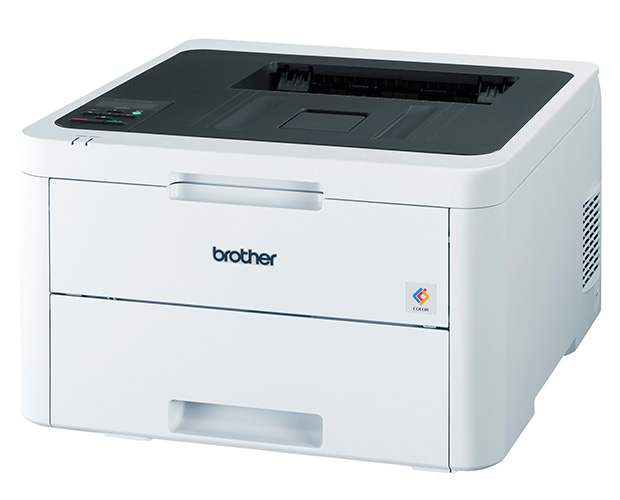
環境: M1 MacBook Air macOS Monterey(12.4) レーザープリンタ 機種:Brother HL-L3230CDW ある時にプリントしてもプリンタが起動して音がするけど何も印刷されていない、という状況に気がついた。 最初は印刷し忘れたかと思っていたけど、どうやら違うらしく、観察しながら印刷作業していると複数ファイルの印刷の時にも起きることが判明。 例えば10ページ印刷したのに最初の数ページしか印刷されずに、ジョブが終了されて印刷のウィンドウが閉じてしまう。 さらに性質が悪いことに、この症状は毎回起きるわけではなくて稀に起きる。一日にある程度の数のファイルを印刷するの […]